Attention: Here be dragons
This is the latest
(unstable) version of this documentation, which may document features
not available in or compatible with released stable versions of Redot.
Checking the stable version of the documentation...
Exporting packs, patches, and mods
Use cases
Oftentimes one would like to add functionality to one's game after it has been deployed.
Examples of this include...
Downloadable Content: the ability to add features and content to one's game.
Patches: the ability to fix a bug that is present in a shipped product.
Mods: grant other people the ability to create content for one's game.
These tools help developers to extend their development beyond the initial release.
Overview of PCK files
Redot enables this via a feature called resource packs (PCK files,
with extension .pck).
Advantages:
incremental updates/patches
offer DLCs
offer mod support
no source code disclosure needed for mods
more modular project structure
users don't have to replace the entire game
The first part of using them involves exporting and delivering the project to players. Then, when one wants to add functionality or content later on, they just deliver the updates via PCK files to the users.
PCK files usually contain, but are not limited to:
scripts
scenes
shaders
models
textures
sound effects
music
any other asset suitable for import into the game
The PCK files can even be an entirely different Redot project, which the original game loads in at runtime.
Generating PCK files
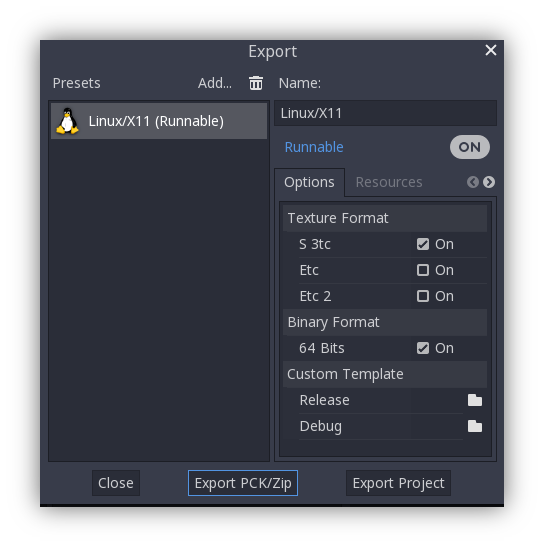
In order to pack all resources of a project into a PCK file open the project and go to Project/Export and click on "Export PCK/Zip". Also make sure to have an export template selected while doing so.

Another method would be to export from the command line. If the output file ends with a PCK or ZIP file extension, then the export process will build that type of file for the chosen platform.
Note
If one wishes to support mods for their game, they will need their users to create similarly exported files. Assuming the original game expects a certain structure for the PCK's resources and/or a certain interface for its scripts, then either...
The developer must publicize documentation of these expected structures/ interfaces, expect modders to install Redot Engine, and then also expect those modders to conform to the documentation's defined API when building mod content for the game (so that it will work). Users would then use Redot's built in exporting tools to create a PCK file, as detailed above.
The developer uses Redot to build a GUI tool for adding their exact API content to a project. This Redot tool must either run on a tools-enabled build of the engine or have access to one (distributed alongside or perhaps in the original game's files). The tool can then use the Redot executable to export a PCK file from the command line with OS.execute(). The game itself shouldn't use a tool-build of the engine (for security), so it's best to keep the modding tool and game separate.
Opening PCK files at runtime
To import a PCK file, one uses the ProjectSettings singleton. The following example expects a “mod.pck” file in the directory of the games executable. The PCK file contains a “mod_scene.tscn” test scene in its root.
func _your_function():
    # This could fail if, for example, mod.pck cannot be found.
    var success = ProjectSettings.load_resource_pack("res://mod.pck")

    if success:
        # Now one can use the assets as if they had them in the project from the start.
        var imported_scene = load("res://mod_scene.tscn")
private void YourFunction()
{
    // This could fail if, for example, mod.pck cannot be found.
    var success = ProjectSettings.LoadResourcePack("res://mod.pck");

    if (success)
    {
        // Now one can use the assets as if they had them in the project from the start.
        var importedScene = (PackedScene)ResourceLoader.Load("res://mod_scene.tscn");
    }
}
Warning
By default, if you import a file with the same file path/name as one you already have in your project, the imported one will replace it. This is something to watch out for when creating DLC or mods. You can solve this problem by using a tool that isolates mods to a specific mods subfolder. However, it is also a way of creating patches for one's own game. A PCK file of this kind can fix the content of a previously loaded PCK.
To opt out of this behavior, pass false as the second argument to
ProjectSettings.load_resource_pack().
Note
For a C# project, you need to build the DLL and place it in the project directory first.
Then, before loading the resource pack, you need to load its DLL as follows:
Assembly.LoadFile("mod.dll")
Summary
This tutorial explains how to add mods, patches, or DLC to a game. The most important thing is to identify how one plans to distribute future content for their game and develop a workflow that is customized for that purpose. Redot should make that process smooth regardless of which route a developer pursues.